Last July we made our first trip to the Salem Art Festival in Salem, Oregon. It was at that wonderful festival that I purchased my pre-bonsai Chinese Elm tree.
A pre-bonsai has been partially trained and is significantly less expensive than a true bonsai. A pre-bonsai, therefore, is a great way for a beginner to learn the art of bonsai. Since I am the definition of beginner when it comes to bonsai, I purchased this book.
Purchasing the tree in the middle of summer meant there was little I needed to do besides keep it watered and fertilized. Much to my delight, I kept the tree alive and growing over the hot summer we had last year. When the weather started to turn in late fall, I moved the tree up next to the house where it sat until recently.
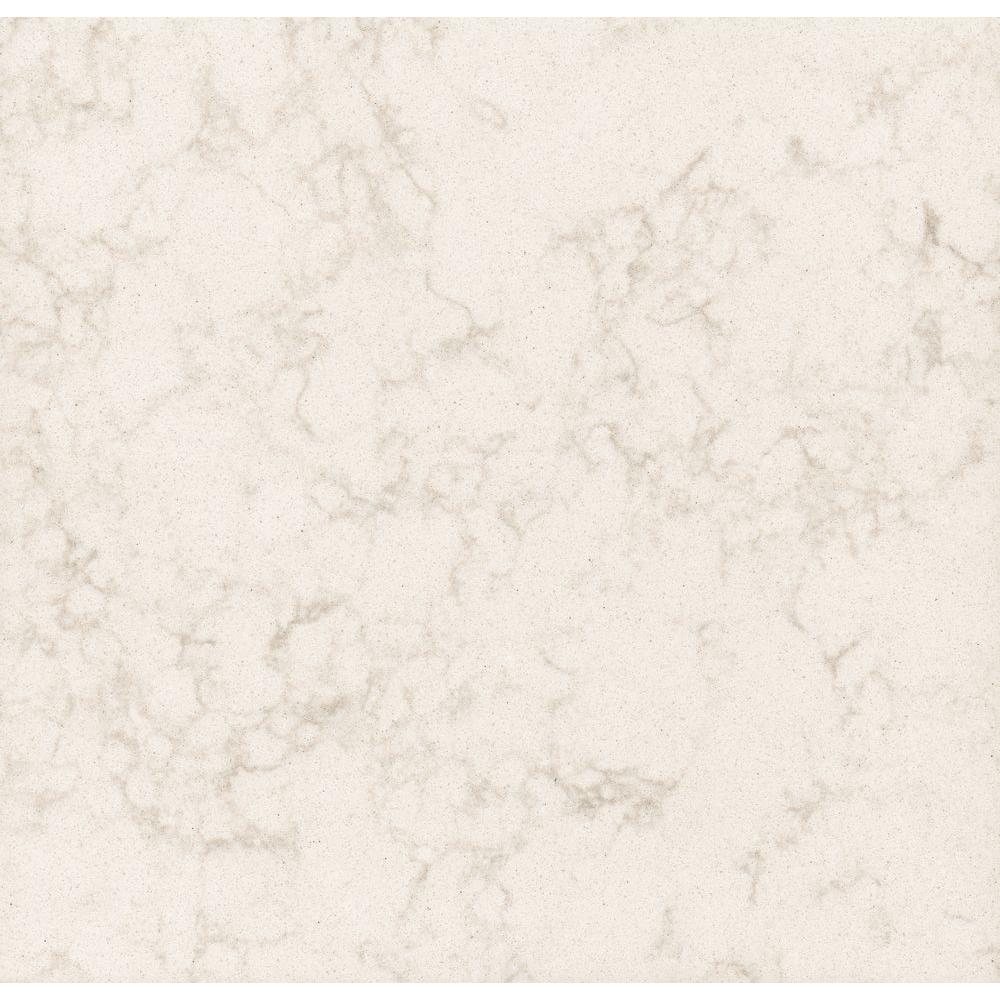
Over the long winter I researched new pots for transplanting the tree. Rather than purchase just any bonsai pot though, I decided to ask my friend at work if he could make one. I've mentioned Bob's work before as he's made just about all my plates and bowls (pictured). Lucky for me, he bought a kiln last fall and can now churn out the pottery any time I want he wants!
Just look at the wonderful pot he made for my tree! His work is seriously beautiful.
Alas, winter in Portland this year seemed to really hang on and we had multiple late February - early March snows, however, the weather did finally seem to turn the second weekend of March and I was more than ready to try my hand at re-potting my bonsai.
Armed with my book knowledge, I started by preparing my new pot, covering the bottom holes with some garden fabric I had already.
I then fed a couple 6-8 inch pieces of wire through the bottom small holes and through the fabric. Since the typical bonsai pot is rather shallow, the wire is used to tie the roots to the pot.
Now the fun part; I get to use my tiny tool set! After cutting around the edge of the pot the tree was in, I carefully lifted it out and used the tiny rake to gently untangle the roots.
It became more evident once the roots were untangled as to where to cut. In this case, I cut all the lanky, long straggler roots then rinsed the root ball.
I then placed the root ball in the pot around the wires. Aesthetically, it's important to place the tree slightly off-center in the pot. Next, I gently twisted the wires securing the tree to the pot.
Finally, I added soil to cover the tiny exposed roots and watered, waiting to fertilize until the growing season starts in earnest.
Some bonsai trees require very specific soil, in the case of the Chinese Elm, I was able to just use a basic bonsai soil mix.
I gave my tree a little trim to the branches and placed it back against the house to protect it until the fear of frost is over, hopefully soon! Time will tell on whether this re-potting was successful, fingers are crossed!
**Update** I'm happy to report, my bonsai re-potting was successful!
I have a quick and easy project to share that we completed last October. I neglected to share it back then because life got in the way and then the holidays, yada yada yada.
Anyway, if you have ever thought about replacing the doors (or adding some if you don't have any) on your fireplace, I hope this post gives you encouragement to do so because it's easy.
Upstairs fireplace
In our home, we have two fireplaces, the one upstairs which I converted to gas, already has fireplace doors on it, and the one downstairs in my son's bedroom which we never use.
Many years ago I removed the old doors that were on the downstairs fireplace to paint the brick and I never put them back (they were 1970's chrome and black doors that screamed 1970) only the screen was left in place. Since we never used the fireplace, I shoved something up the chimney to alleviate any drafts. Well, many windstorms later, whatever I shoved up there was gone and cold air was coming in and heat was escaping out. So, last October I decided to do something about it before winter hit. Naturally, I started googling 'How to replace fireplace doors?'
There are many videos on YouTube that document the process, but the take away is the doors are attached via a couple clamps to a lintel bar at the top (which if you're replacing a door this will already exist) and with two screws and brackets to the bottom of the fireplace.
Here's a nice schematic that I pulled from a This Old House post that will walk you through the process and is worth a read.
Most doors that you purchase from a fireplace store, Home Depot or Lowes will fit openings within a specified range and will come with attached screens. You'll want to measure the height and width of the opening of your firebox then find a door that's size-range will fit.
In our case, I went with this door from Home Depot for $399.
I don't have a lot of pictures of the process but I've included a few pictures of what we were dealing with before the new doors and after they were installed.
Before was just a bare screen which was attached to the lintel bar with a couple clamps.
After removing the screen, we installed the new doors. Most doors come with insulation that is placed behind the top and sides of the doors.
This whole project took about an hour and a half to complete. Honestly, I don't know why I waited so long to do it.
The new doors look so much better and are definitely saving money on heating costs.
If you're on the fence about trying this project yourself, don't be. It really is easy and well worth the effort.
I've been holding out on you. It may seem by the looks of my posts lately, that I'm not up to much. That is FAR from the truth though.
This holiday season I decided to branch out a little and participated in a Holiday Bazaar that was NOT affiliated with my day job. Dec 6 found me at the Madeleine Marketplace held at the Madeleine church in Portland. I'm so glad I did this bazaar! I met some great people, sold a lot of awesome soap, and even picked up a new contract for soap! Needless to say, next year I'm going to try and participate in a few more holiday bazaars.
It looks so sophisticated and it's still packed with the same wonderful ingredients and scented with lemongrass and basil essential oils!
If you follow me on Instagram (click here if you don't), you may have noticed that I finally got the 'Shopping' feature working on my posts! Now when you see a photo of my soap, you can click the tag on the image and be directed to my website to order! I'm so glad to finally add this functionality to my business.
On another soap related note, I will need to raise my prices come the new year. I try very hard to keep my prices to a minimum and in the almost 10 years I've run my little soap business I've never raised the prices. Unfortunately, what with the cost of supplies going up and using inferior ingredients not an option, that's got to change.
So come January all soap bars go up in price by $1. Good news though, I will add a permanent special so you can order 5 bars for $25 which will bring the price back down to $5 a bar! I will also continue to offer Free Shipping on orders over $35. I will make this change to the website sometime in January when I have time, so get your orders in fast before the price goes up!
I know I've blogged a lot about my kitchen projects over the years (here, here, and here), but I've got another update!
I've been wanting a tile backsplash for ages but felt restricted by the way the counter tops went up the wall a few inches (see photo). Since the counter tops were over 15 years old and I am no longer crazy about the red color, I saved my money and got new counter tops!
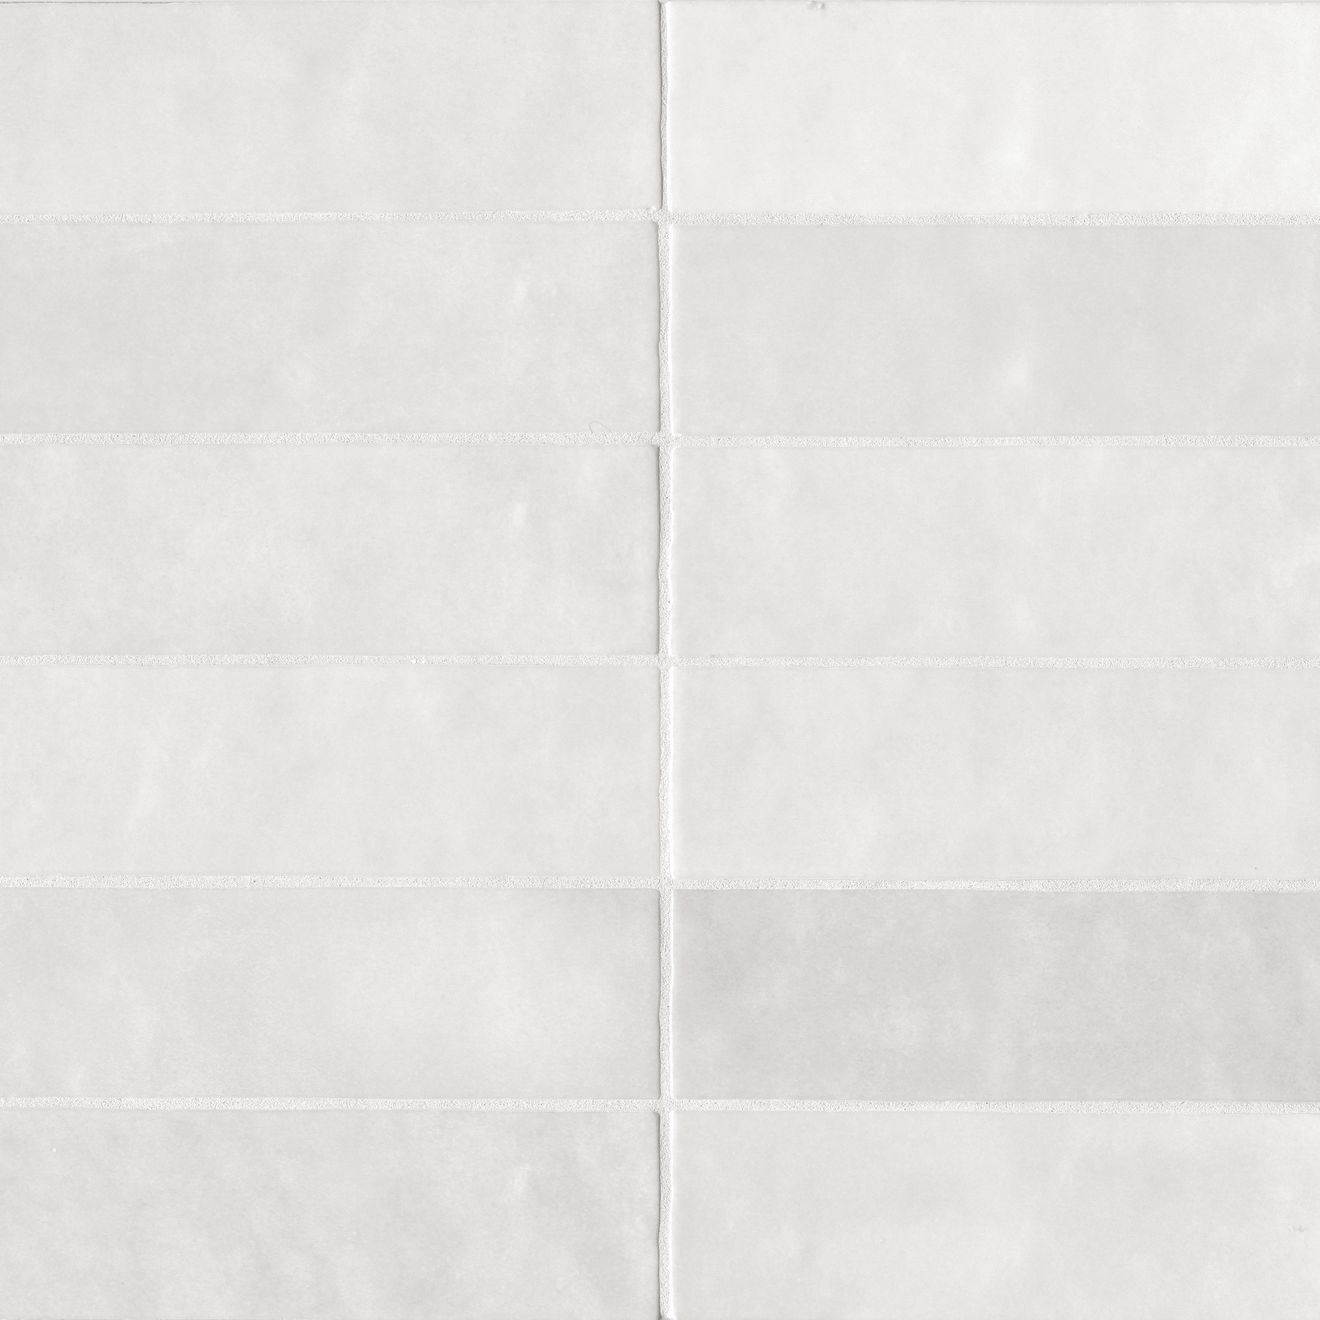
Once the counter tops were installed, Jeff and I tiled the backsplash! I used Cloe wall tile from Bedrosians. Here's an image:
We installed the tile ourselves and this was the first tile job I've ever done. I'm so pleased with how it turned out!
There are a gazillion websites and videos (I watched most of them!) that show you how to DIY your own tile backsplash so I'm not going to pretend I'm an expert now and write about it.
Instead, I know you're waiting for the before and after pictures and here you go:
We knew when we got our birds, Ed and Olive the cockatiels, and Harlan the grey parrot, that we wanted them to fly and experience the outdoors. So it was only a matter of time before we started thinking about outdoor aviaries.
We have a very small yard and when we started to look into outdoor aviaries it was apparent that finding a place to put one wasn't going to be easy. We also had specific requirements we wanted which were hard to meet with an already built aviary.
We wanted an aviary that could easily break down and store in the winter. We also required a double door so moving in and out of the aviary would not pose an opportunity for the birds to fly out. Lastly, we needed stainless steel or galvanized stainless steel mesh that was small enough for the cockatiels.
After many Google and Amazon searches, we decided the best solution was to build one and to build it under the maple tree along the front pathway. Right there where Jeff is sitting.
The first step towards building the aviary required the removal of the stones, leveling the ground, and installing pavers.
We placed weed barrier fabric on the ground then sand and gravel, and the pavers over that. We used fairly large pavers to minimize the cracks so the aviary had a sturdy surface.
Using 2 X 2s that were 8 feet long, we built 9 panels that made up the aviary's sides, doors, and roof.
We primed and painted the panels so they would withstand the weather better.
Jeff found a place on the internet that sold a large roll of after weld galvanized steel mesh that met our needs. It was delivered on a large truck and yes, it was heavy.
The mesh was cut and stapled to the panels overlapping the edges to secure it even better as Harlan could most certainly pull out staples. The panels were then bolted together.
The aviary was Jeff's design and he did most the work. It consumed the better part of two weekends and the Fourth of July holiday to make.
Naturally, the birds love it!
Come October, once it starts raining, we can unbolt the panels and store them in the garage.
Right now, while the weather's nice, these caged birds are enjoying the outdoors!
Sometimes I randomly discover something that's a life changer.
Lucky for you, I'm going to share a couple things I've found because they're too good to keep to myself.
This first one Alec, my son actually discovered and, well, yes this one may very well be life changing!
It starts with peanut butter, the kind you have to stir because it's all natural (aka the best kind) and the oil separates from the ground nuts. Here's the trick, store the jar upside down! No more oily peanut butter on top and dry peanut butter on the bottom! Yea, I know! You're welcome.
The second life hack involves coffee. If you feel your coffee is just a little too bitter, before you brew it, put one shake of cardamon in the coffee. Careful not to add more than a shake you just want to cut the bitterness and not over power the coffee flavor.
My mom also swears that one drop of vanilla extract in your cup of coffee will also cut the bitterness.
Last weekend we made a trip to the Hulda Klager Lilac Garden in Woodland, Washington for the Lilac Festival.
Next to the scent of daphne in the winter and gardenia in the summer, lilacs in the spring are my favorite!
After visiting the gardens I promptly went home and cut some of my lilacs for the house. I rounded up this hack on how to prolong the life of your cut lilacs I shared a couple years ago.
Let's take a break from all this holiday cheer to talk about something near and dear to my heart....
I'm not positive but I'm pretty sure this year marks the 20th year I've been commuting by bicycle to work. Sure, that statement dates me and if I count commuting to school by bike too, its been over 30 years.
Are you interested in bicycle commuting or just think I'm crazy to have done it for so long? Well read on because I'm going to share a little wisdom and a lot of common sense on how it's done.
First and foremost, when you're job searching or home searching, make the commute a priority! When I moved to Portland, Oregon back in the late 80s I had a job. I knew where I was going to work so when I was looking for a place to live, the number one priority was that I was close to work; less than 5 miles. Since initially moving here, I've lived in five different places, but none farther than 5 miles from work. I could probably stop here as this really is the most important part of bike commuting, however then I wouldn't get to talk about the fun stuff, like the bike and gear!
Let's start with the bike. You're going to want a comfortable and safe bike. Over the years, I've commuted on 5 different bikes (really, there's no theme of 5 here) and I've concluded that the most comfortable, responsive rides I've had are on bikes with steel vs aluminum frames. Having never owned a titanium framed bike, I can't speak to them.
Also important and simply weren't around when I first started bike commuting, are disc brakes. Seriously, these are a game changer for bike commuting especially in wet conditions. They allow you to stop much quicker than bikes using caliper or cantilever brakes and the upkeep is much easier. Twice a year I get my bike tuned up and they adjust the disc brakes and install new pads if needed. I think I've only replaced the pads on the disc brakes once or twice in 6 years, in comparison, old style brakes go through pads every couple months.
Aside from the bike, there's a litany of accessories to buy for it and most are personal preference except fenders, lights, and a helmet.
Fenders are a necessity if you're ever, ever going to ride in the rain. They will keep your backside dry and just as important, keep you from being the a-hole rider that spews water onto everyone behind them or passing them. You don't want to be THAT rider and because of that, opt for fenders that cover most of your back tire.
Lights have also come a long way since I've been bike commuting. The use of LEDs in bike lights mean you don't need to haul around a 5 lb battery pack to light your way (or those old generator lights that ran off the friction of your tire--ahhggg!)
For me, since most of my route to work is well lit and I'm not riding in complete darkness, the lights on my bike are more for others to see me rather than for me to see where I'm going. Therefore, I opt for a simple front white blinking light and a red back blinking light. Both these lights have the option of not blinking but blinking lights let drivers know you're a bike and they can plan accordingly. I also like that these lights take simple AA batteries and not some fancy battery you have to run to a special store to get.
A helmet is just common sense, especially if you ride in increment weather. You can spend as little as $15 or as much as you want. I've crashed 3 times on ice and each time I fell and hit my helmet on the concrete before I even knew what happened. It was quick and there was no way I could have kept my head from hitting the ground. After a crash, it's always important to replace your helmet, they're only meant to withstand one blow. Oh, and by the way, don't try riding when it's icy out. Take the bus or work from home.
What you wear to commute in, as long as you followed my advice and aren't commuting 40 miles, is really up to you. As work environments become more casual, I see more and more people wearing their work clothes on their bike and that's certainly how most Europeans commute by bike.
Regardless, one thing you'll want to invest in is a good, reflective rain jacket one that will keep you dry from the rain on the outside and not trap the sweat on the inside. Along that same line, on really rainy days you'll probably want some rain pants. The past couple of years, I've been using a bike poncho to commute in wet weather. I prefer this to rain pants as I find rain pants slip around on the bike seat. I also recommend, for those really rainy days, a pair of shoe covers. They're not expensive (I've even seen people just rubber-band some plastic bags around their shoes) but are worth it.
There are plenty of other accessories you can buy and are important (like gloves and ear muffs) however, you'll probably find over time what you need and like. Early on in my bike commuting, I used a rack on my bike with panniers. I've since migrated to just using a messenger bagand find I like it better.
How to ride safely, is more important than any gear you buy. It takes a long time to feel comfortable on a bike in traffic. It's important to always be visible and that means riding in the lane with cars if you're on a street with a traffic speed of 35 mph or less (and you should be.) You don't need to take all the lane, but don't hang out so far on the shoulder that you have to swerve in and out of traffic to get around parked cars.
It goes with out saying that when you're on a bike you're vulnerable. Your best line of defense is to act predictable which means follow the traffic laws, stop at stop signs and red lights, take your turn at four way stops, signal when turning and changing lanes, and ride in a straight line.
The best advice I can give for bike commuting is simply to try it. You'll discover over time what works well and what doesn't work but just try it.
And now if you've stuck with this post long enough to get to the end, for your viewing pleasure, here's a (bad) video of my commute.
If you're still reading...don't forget it's not too late to order Lora's Beauty Goats' Milk Soaps for the holidays! They make great gifts for everyone on your list and with free shipping on orders over $30 in the US you can't go wrong!

 Over the long winter I researched new pots for transplanting the tree. Rather than purchase just any bonsai pot though, I decided to ask my friend at work if he could make one. I've mentioned Bob's work before as he's made just about all my plates and bowls (pictured). Lucky for me, he bought a kiln last fall and can now churn out the pottery any time